Wednesday, May 2, 2012

Final Capstone Project Completed


Capstone project: Done.


Here are the images of the sculptures as they are in the Lightwell Gallery:


 The frames for these hold the sculptures two inches off the ground and are built two inches from the sides. I used graphite spray and white and black spray paint to complete these.

Sculptures in black:


Sculptures in white (although, here they look yellow): 


Sculptures in graphite:


______________________________________________________________________________________


At the beginning of the semester, I originally had planned to use my paintings for my capstone project instead of my sculptures. Although I decided to go with the sculptures, I've still been working on the paintings for my painting class. Here is just an update. The smaller paintings are glued to the largest. I need to paint the frames and do some final touches and I will be done with this project, as well.

Tuesday, April 3, 2012

Fibonacci Sequence

So I've decided not to use my paintings for my capstone and use my sculptures instead.  I usually have a hard time finishing paintings and I don't want to risk having to present unfinished or sloppy paintings.  I still plan on finishing them for my painting class.  I'm also not as interested in the concept I have for the paintings as I was last semester, which I think was obvious in my last presentation.  By doing these paintings, I feel I am only trying to recreate what I did last semester and changing a few things. 

I have been working on my sculptures all semester and I feel I have a better chance of finishing them on time for the Capstone show.  My sculptures are more formal and less conceptual than the paintings.

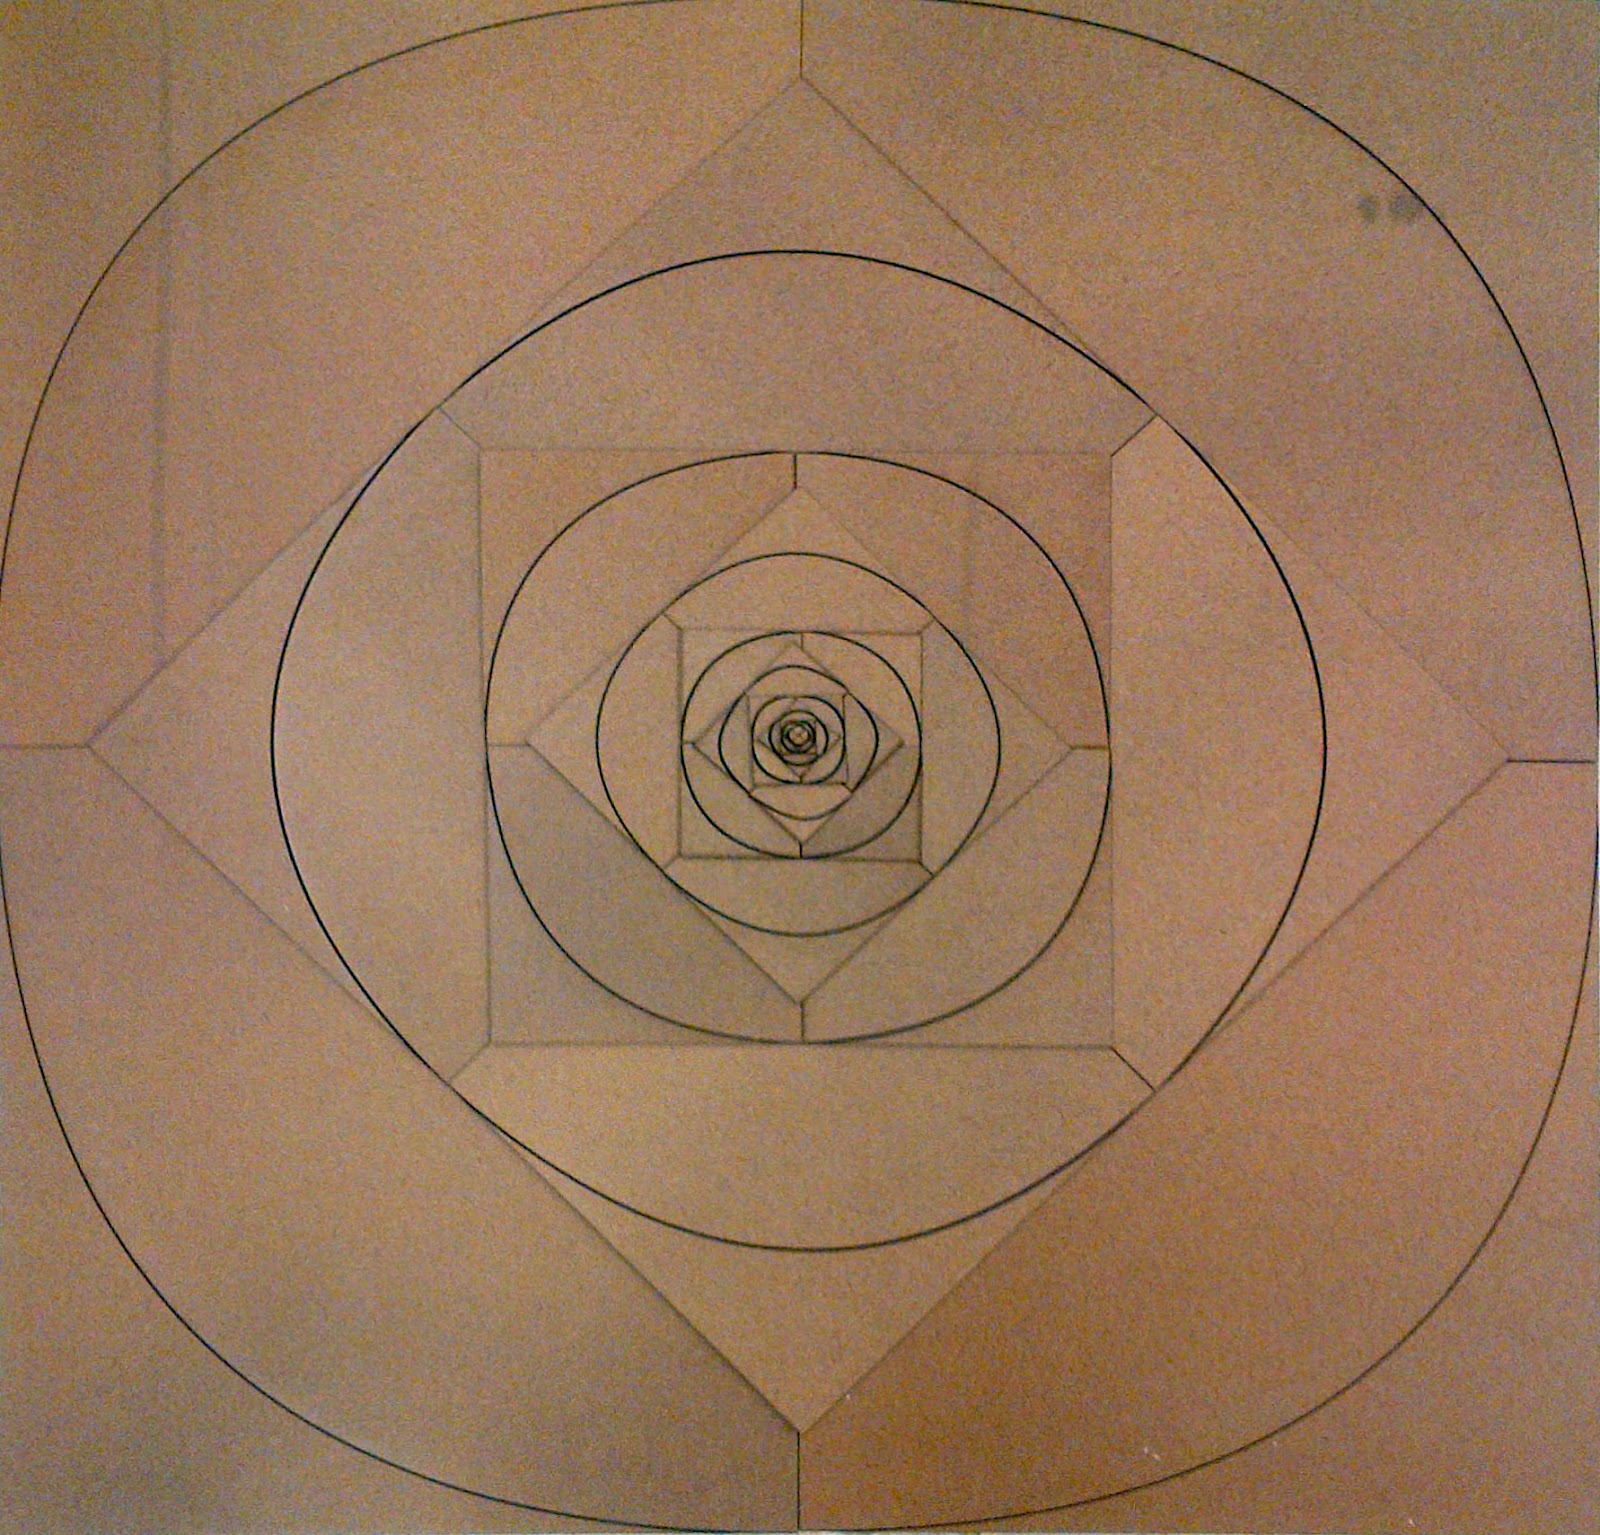
There are a couple of sketches for the sculptures that I have put in a previous post from earlier this semester.  The sculptures are based off of the Fibonacci spiral.  I got inspiration to do the sculptures after reading The Divine Proportion: A Study in Mathematical Beauty by H.E. Huntley.


Above is the Fibonacci spiral which I used as a template.  I cut 21 squares of every size and etched the spiral into Masonite using the laser cutter.  I then began stacking the squares in different ways to see what new designs I could create with the spiral.

Here are the pieces I have come up with by stacking the squares and example of what might be in the show:


And here are close ups of most of them which are most often made with one of each size square for every design:


 This is the very first one I made.  There are four pieces of masonite stacked for each size.  When viewed directly above the smallest squares at the top left, you can see a new arc.

 
 This one is the largest and my favorite so far.  Its about three feet by three feet and made with four of each size square.


 This is made with two of each size square.

 
 This one was the first and only design I used that I drew in my sketch book.  The sketch is in a previous post.  This one I will have to rebuild because, due to my impatience, did not hold up very well and the pieces were not laying flat.  Luckily I have extra in case I decide to use this one. 


 This is just a side view of what is pictured above to show the depth of most of them.


I plan to display the pieces that are going to be in the show on the wall so I will build frames for the ones I decide to use.  Because I am using the Fibonacci spiral which is found in nature, I am going to paint each of these in colors found in nature. 


Wednesday, March 7, 2012

Capstone

For my capstone, I am doing a series of stacked paintings with oil on panel. Its basically going to have a background and I am going to add in figures in paintings that can be viewed over the largest, background painting. 

This is a painting project I did last semester with a similar idea.  There are three paintings here that  should line up to create another painting

The main difference between these two paintings will be the color.   The background painting is going to be done in realistic colors while in the paintings that stack over it, the figures will be all that is in realistic colors.  Their surroundings are going to in colors of their choice.  The different perspectives of the people in one area.   

These are a few quick, hard to see, sketches I did just to get the general idea down.  The one of the right also shows possible ways to display the paintings.

This is a picture I took and put in rectangular blocks to show how what each painting will look like individually as well as in the stacked composition.
  
Here are some bad sketches with colored pencil just to show an example of how the colors might be.  I only have two figures so far but I plan to at least get one more. 
This is the background painting so far. 
  While I finish working on this painting, I will work on sketches for the figures in future paintings and cut panels to fit the dimensions for those paintings.  I also plan to find another figure or animal to place at the bottom of the painting.


Tuesday, February 7, 2012

First Project(s) of 2012

I have started working on two projects for this semester because I could not decide between the two. 

The first idea I had for the first project came from several ideas and things I have attempted in the past.  One of these, was to create boxes using a mat board and build up to make it three dimensions without cutting anything part of the mat board completely off.  This was very unpredictable but I wanted to see if I could create something with the three-dimensional result. After getting very frustrated trying to get it to stand and look somewhat aesthetically pleasing, I decided to go in a different direction.

For this project, I wanted to make similar boxes to create a grid-like pattern for a  three-dimensional painting, which I also have done in painting classes.  Here are some of the sketches I've done for this:


These show how I am building on the idea and how I would like it to look and how I want to assemble the parts.  For the painting I want it to be basic colors and shapes as one would see in a memory.  This was inspired by Joan Mitchell's idea to preserve memories.

The second idea for the first project came to me as I was reading The Divine Proportion: A Study in Mathematical Beauty by H.E. Huntly.  I have not finished the book because I find myself trying out the math and figuring out how the 1:1.6180 ratio works and trying to see if I can find the ratio in various things.  Using the ratio, I tried drawing the logarithmic spiral and got a basic understanding of how the ratio works.

Although, I figured out that I can draw the spiral, I wanted to do something more with it.   I drew the spiral in Adobe Illustrator and plan to laser cut the pieces to create something new.  I may make two to four of each piece and possibly make it movable by connecting the pieces in the corners just to experiment.  This idea just came from what I have learned so far in the book and I want to experiment with it.

Thursday, May 12, 2011

Welding Project

For this project we were given metal as our materials and taught how to weld and use other various cutting tools for metal.  The class was assigned the word "precarious" for the making of this project. 

I looked up the definition on dictionary.com:
precarious: dependent on circumstances beyond one's control; uncertain; unstable; insecure

I also looked at google images and most of the images were of people and houses balancing on unstable large rocks and other things found in nature.
There is a tree that is across the street from my house that also looks precarious in that its weight seems to be leaning all to one side yet it is still standing.  This tree somewhat inspired my sculpture.


Laser Project

For this project, we were told to make a sculpture using the laser cutter.  To do this we had to create an image using Adobe Illustrator.  The image I created on Adobe Illustrator is made up of lines using the arches tool.  All of these arched lines were placed randomly and connected to each other at their ends.  I am unable to upload the image but you can see part of it in the end result.  My original idea was to make a sculpture that hung close to a wall with a light behind it. 

I chose to fabric to use on the laser cutter because I knew I wanted to sculpture to be flexible and lightweight. I bought canvas from Hancock Fabrics because it  seemed thick enough to etch an image into. To fit the space in the laser cutter, I had to cut the fabric and the image into four sections.  After etching the image onto the fabric, I connected the four panels back together by ironing them on to interfacing.  I chose to use interfacing rather than sewing the pieces together because I wanted the image to be as flat as possible and the lines to match up.

After I had to pieces together I wanted to take advantage of the flexibility of the fabric and the lights that were already in the room and decided to make a sculpture that could hang from the lights.  The plan was to use grommets, to put sturdy holes in the fabric, dowel rods that I would put through the holes to hold the fabric spread out enough so that the image could be seen, and string to tie to the rods and hang from the lights.  When I was ready to hang the sculpture I decided not to use the string but put the dowel rods over the lights and use them to hang the fabric as well.